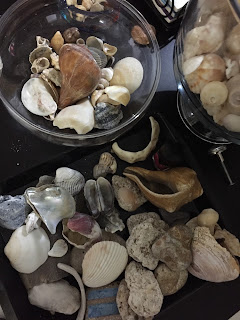
I also love seashells. My new passion is seeking out seashells because that's a great reason to go to the beach. Now that I have moved down South and the most beautiful tropical beaches are just a few miles away, going to any one of the beaches is the best way in the world to clear your head, leave reality behind for just a little bit and remember that out there, the sky meets the ocean and everything possible is on the horizon. Seashells are a token of that visit. They are big and small. Sea shells that are hard to find and some very common but every size, shape, color and type are just amazing and beautiful. I quickly have brought home so many seashells I love that I need to keep making things I love out of things I love.
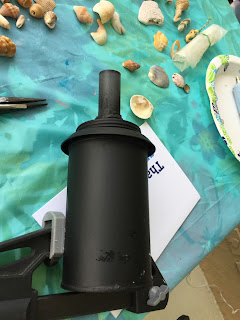
We happened to have two leftover tiki candle cans that we had never used (I never set anything on fire with actual flames if I can help it probably due to my firefighter career (you can read more about that here) and had used the big tiki candles with two solar lights in it to light the back area of the house until they kept getting knocked over when we trimmed the bushes. The tiki torch holders were long gone but the cans and solar lights we still had. Tiki cans with no cool holders are just not that great looking. So out of the garage came the cans ready for a diy seashell home renovation.


First thing my husband did was clean off the can including any rust it had accumulated then spray paint it black so the writing and old stuff was all covered up and looked much better already.
Seashell home art projects often require the work of a glue gun. Shells are so irregularly shaped sometimes the mod podge and tacky glue just doesn't work. Your hot glue gun will work with seashells on almost every surface but you have to definitely have patience and definitely have fingers that will probably have to hold up to a couple of hot glue gun burns!
Slowly but surely my husband worked his way around the cans sea shells and glue, choosing some of our favorite calico shells, olive, clam shells, small conch shells, all the colors and shapes that would fit into each spot. Every single shell we found with our own hands, during so many visits to the seashore every day new finds now DIY fastened to a cool new home light project.
Not to say there wasn't any under the breath cursing every time a finger met the glue or the shell moved or the glue dried before it was in the right spot, but it was worth every minute. It took a couple of days between spray painting the light cans, hot gluing the shells to the light but it was like adult arts and crafts that ended up a DIY project we really use and love.
After both lights we decorated with shells, the hot glue all set and the lights cleaned up and charged by the sun we covered the entire beach shells surface with mod podge to seal it up hopefully keeping the harsh weather from breaking down all of our hard work. So far, so good!
We hope you will join us on Facebook at Bonfire Designs and share some of your home DIY projects, fun beach adventures or share your love of beaches with us too.


